Showing posts with label recipes. Show all posts

Thursday, April 1, 2010

Pumpkin French Toast

How do you get a picky toddler to eat more vegetables?

A few weeks ago I stumbled across a cookbook about how to hide vegetables inside kids' food so that they will consume more of them without realizing it. I do not agree with this philosophy at all, because I think that children have a right to know what they are eating, and because I don't believe it actually encourages kids to "like" eating vegetables! Parenting has to include building trust between the parent and the child, and I don't ever want my daughter to think that she can't trust me to tell her the truth about what I am giving her.

Instead, I prefer to capitalize on what N. does like and build from there. I continue to serve her a variety of foods each day that she has both liked and disliked in the past, and every once in a while she will decide to like a new food. (Recently: honeydew melon and grapes.) I also regularly serve her favorite nutritious foods so that I can be sure she's getting the vitamins she needs.

The cookbook did have some ideas I found intriguing, though; in particular, inserting vegetable purees into common everyday foods. I decided to try this myself, but WITHOUT HIDING! N. watches, and even helps, as I spread her quesadilla with pureed carrot or her grilled cheese sandwich with butternut squash. And one of her new favorite breakfasts is pumpkin french toast!

1/4 cup canned pureed pumpkin
1 egg
1 slice whole grain bread
a pinch of cinnamon
cooking spray or oil/margarine

1. Mix together the pumpkin, egg, and cinnamon in a bowl.
2. Soak the bread in the mixture, about 30 seconds each side.
3. Heat a pan that has been sprayed and/or dotted with oil or margarine.
4. When the pan is ready, place the bread in it. Pour any excess pumpkin-egg mixture on top of the bread (there will probably be a lot). Lower heat, cover, and cook for about two minutes.
5. Flip the slice of bread and cook the other side for about two minutes, or until it appears that the egg is all cooked. Continue flipping and cooking as needed until you are sure it is thoroughly cooked.
6. Cut, cool, and serve! Can be topped with maple syrup or powdered sugar if desired. Personally, I think it needs a little sweetener, but I try to serve it to her without much extra sugar.

Sunday, February 7, 2010

Sunday Dinner

Growing up, Sunday dinner was always a little fancier than the rest of the week. Maybe something that cooked for a few hours on the stove or in the oven, maybe a fire in the fireplace, and maybe sitting in the dining room instead of the kitchen.

I've tried to keep up the tradition, and sometimes nothing says "Sunday" like meat and potatoes. But since we don't eat meat ... it's time for Field Roast!

We buy it at Whole Foods or at our local co-op. It's easy, and we all love it. I make a vegetarian gravy and serve up some cooked vegetables and potatoes, and voila - fancy Sunday dinner!

Vegetarian Gravy

1 carton (4 cups) vegetable broth
1 bulb of garlic
1 T olive oil
2 carrots, coarsely chopped
a bunch of fresh ground pepper
1/4 cup nutritional yeast
some white flour
a little butter (optional)

1. Bring the vegetable broth to a gentle simmer on the stove. Add in the carrots and pepper.
2. While the broth is simmering, slice off the top of the garlic bulb, pour on the olive oil, cover in a microwavable dish, and cook on high in the microwave for 2 minutes.
3. Allow the garlic to cool, then peel the individual cloves and add them to the broth.
4. When the carrots are soft, puree them with the garlic into the broth. (I use an immersion blender, but you could also pour it into a food processor.)
5. Whisk in the nutritional yeast and bring to simmer again.
6. Whisk in the flour, or, if you have more time, cook the flour in the butter to make a paste before whisking it in.

Sunday, January 17, 2010

Quinoa Casserole

Quinoa is an grain that originated in the Andes Mountains of South America. It is high in protein and iron, making it great for vegetarians. The grains are about the same size as couscous when uncooked.

When I first read about quinoa I was intimated by the need to rinse it before cooking. Once I tried it, though, I realized how easy it was. N. likes it some days, especially if I leave out the spices!

I usually bake it in a casserole using the following general guidelines:

1 T canola oil
1 medium onion, diced
2 cloves garlic, minced
1 red or green bell pepper, diced (optional)
1 cup dried quinoa, rinsed in a wire strainer under cold running water for 2 minutes
1 can black or pinto beans, rinsed and drained
1 28-oz can diced tomatoes
1 T chili powder (optional)
1 tsp ground cumin (optional)
2 cups vegetable broth - approximately

1. Saute the onion, garlic, and pepper (if using) in oil until softened.
2. Mix all ingredients except the vegetable broth in a casserole dish.
3. Add the vegetable broth until the mixture is a couple of centimeters from the top of the dish.
4. Bake in 375 degree oven for 1 hour. Check after about 45 minutes, stir, add more broth if needed.
5. The quinoa is finished when it is puffy and translucent.

I think the photo shows some corn in there, too, but I usually leave that out.

Serve with grated cheddar (optional).

Friday, January 1, 2010

Minestrone & Brussels Sprouts - A Holiday Recovery Meal

We traveled for Christmas, ate too many cookies, and suffered a bit from jet lag. For our first dinner back at home, I wanted a low-fat, high-nutrition, comforting meal. I made minestrone soup for everyone, broccoli and peas for N., and sauteed Brussels sprouts for the adults.

N. not only loved the minestrone - veggies and all - but she also requested some of our "sprouts." Then she requested more, and more, and more. We were amazed at her sudden love for them. Perhaps it was in the saute... or perhaps all the holiday food just left her body craving vegetables!

Easy Minestrone:

2 T olive oil
1 medium onion, diced
2-3 cloves of garlic, pressed
3-4 stalks of celery, diced
2-3 carrots, diced (I actually used about 12 baby carrots)
4 cups vegetable broth
2 tsp dried oregano
2 tsp dried thyme
1 tsp dried basil
1 can kidney beans, rinsed and drained
2-4 oz small dried pasta shapes (I used broken spaghetti, about 1 inch long)

1. Heat olive oil in large pot.
2. Saute onion and garlic for about five minutes, until onion is soft and translucent.
3. Add carrots and celery; saute another five minutes or so.
4. Add vegetable broth and bring to boil.
5. Lower heat, add spices, and simmer about ten minutes.
6. Add beans and pasta and cook for another 10-15 minutes.
7. Serve with parmesan cheese (optional). If needed, add salt and/or pepper to taste.

Sauteed Brussels Sprouts:

10 oz fresh Brussels sprouts (I like the Trader Joe's bags)
1 T butter
1 T olive oil
1 clove garlic, pressed

1. Trim the ends off the Brussels sprouts and remove the tougher outer leaves (just the first layer). Cut each one into four quarters.
2. Heat the butter and oil in a large skillet until the butter is melted and they coat the bottom of the pan.
3. Saute the garlic for 1-2 minutes.
4. Add the Brussels sprouts, stir well to coat with butter & olive oil, cover, and reduce heat to medium-low.
5. Continue cooking for about fifteen minutes until soft, stirring every 3-4 minutes to make sure they aren't sticking to the bottom of the pan.

Sunday, September 20, 2009

Tofu Shapes

Every once in a while I have an unusually satisfying success. Yesterday afternoon was one of those times.

I am always hoping to find more foods are both nutritious and easy to eat, especially if they don't involve bread or cheese. I also like recipes that are easy to make and to clean up afterward.

Several years ago, I stumbled across the Vegan Lunch Box, a blog written by a Washington mom with lots of great ideas. (I also have her first cookbook and am hoping to soon purchase her second.) She has a recipe for Tofu Fish Sticks that always interested me, and now I have a child old enough to eat them.

However, I myself hated fish sticks as a child, so I wasn't interested in making anything that tasted remotely fishy. I also have a daughter who doesn't like strong flavors right now, so I needed to make a plainer version than what Jennifer has on her blog. I ended up designing my own recipe, and it worked very well!

1/2 cup cornmeal
1/4 cup nutritional yeast flakes (read here if you don't know what these are)
2 tsp paprika
1/2 tsp salt
2 T sesame seeds
1/2 cup plain unsweetened soymilk
1 lb firm tofu

1. Preheat the oven to 400. Prepare a cookie sheet. (I like to use a Silpat.)
2. Mix the dry ingredients together in a cereal bowl or pie pan.
3. Pour the soymilk into a shallow bowl.
4. Cut the tofu into slices about 1/2-inch thick. Then use a cookie cutter or knife to create your desired shapes. You'll probably have leftover scraps -- they can be used, too!
5. One at a time, dip each piece of tofu into the soymilk and then the cornmeal mixture and cover both sides. Place on the cookie sheet.
6. Bake in the oven for 15 minutes on each side.
7. Let cool before serving, depending on the age of your child.

Nora didn't like these when I served them at 2pm, but when I served them again at 3:30, she ate three of the heart shapes! Robert ate about ten of the scraps, and I ate a few myself, dipped in ketchup and mustard.

It is somewhat time-consuming to do all the dipping in the two bowls, but I was able to complete most of it while Nora sat in her booster seat having a snack. Then she napped while they cooked in the oven.

Sunday, July 5, 2009

Ode to Frozen Vegetables

Frozen vegetables, oh so cold

Frozen vegetables rarely get old

So easy, so simple, throw them in the pot

Quick, nutritious, and delicious, tedious they are not!

Organic? Yes! Diverse? Of course! I really cannot say...

Enough about these vegetables -- so great in every way!

************

As you can see, my freezer is overflowing as usual with a variety of tasty frozen vegetables. Frozen vegetables are actually said to have more nutrition than fresh, because they are immediately packed into bags after processing, while fresh vegetables can leak out vitamins and minerals during transport to market. I like them because they are so easy -- no need to spend time chopping! I usually buy them at Trader Joe's, which has great prices for organics.

Some common ways I use them include:

-- add thawed blueberries to oatmeal (Nora eats this nearly every morning, with banana mashed in as well)
-- add thawed strawberries or raspberries to plain yogurt
-- add chopped spinach to spaghetti sauce or Mexican-style casseroles
-- add green beans, sliced bell peppers, or broccoli to stir-fry*
-- add any of these same, plus peas, to Thai-style green or red curries*
-- add peas or peas & carrots to macaroni & cheese
-- add thawed and sliced artichoke hearts to pizzas**
-- Serve as a side dish! I microwave broccoli, asparagus, green beans, or peas for 3-4 minutes if my main dish is cooking on the stove. If I'm already using the oven, I might throw green beans or asparagus in a pie pan with some cooking spray and roast them for 20 minutes or so right alongside the main dish.

* This will result in a slightly mushy stir-fry or curry, which might bother some people, but I still find that the easiness of it outweighs the mushiness.
** Trader Joe's has frozen artichoke hearts!

Monday, February 2, 2009

Baby Stir-Fry

In search of a combination of finger food, vegetables, protein, and grains? Try a baby stir-fry. Easy and nutritious!

For protein, I have used cubed tofu and halved black beans. I think other beans would work as well.

For grains, I have used brown rice, brown rice spaghetti, and assorted quinoa pasta shapes. Her hands-down favorite is the brown rice spaghetti, despite its nutritional deficiency as compared to the quinoa pasta. I think she likes it because it clumps together nicely and she can actually get it into her mouth.

For vegetables, I like carrots, broccoli, green peas, onions, and green beans. Last night she had a bit of red bell pepper and mushroom. I keep the vegetables at an adult bite-size for the cooking, but cut them smaller before I put them on her tray.

I found a wheat-free tamari sauce (San-J brand) at Safeway. Of course, not wanting her to have too much sodium, I try to keep the tamari to a minimum. But she seems to really like it, especially on the tofu.

1) Cook rice or pasta according to package directions.

2) Chop all ingredients to desired size. (For stir-frys, a thin slice or dice is appropriate.)

3) Heat canola oil over medium or high heat. Fry tofu (if using) until golden. Spoon out and set aside.

4) Fry vegetables. Start with the hardest (e.g. carrots) and add additional vegetables every minute or two. End with the softest.

5) Mix all ingredients together. Let cool before serving to baby.

Saturday, January 24, 2009

Lentil Balls

We're still not 100% sure Nora has a wheat allergy, but a nurse at our pediatrician's office told us to hold off on giving her any more wheat until we have more info. So, I'm now on a quest to find ways of offering the kinds of foods I'd like to see her eating -- things she can pick up, bite chew on, pull apart, etc -- without using any wheat. It's a challenge.

Last night I made a tray of "lentil balls." I put organic instant oats (no salt or sugar added -- just straight up oats from the bulk food bin at Whole Foods) in my mini-blender and ground them to a powder, as I often did when making her porridge. I then mashed it together with some cooked lentils, a little salt, and sauteed onion and carrot. I baked the lentil balls for 20 minutes. She loved them! She enjoyed being able to control the food by herself, though she did drop a lot down the sides of her chair. I gave her another this evening and it was a hit again.

The amounts below are approximate as I didn't do a good job of measuring, but I think different proportions could work as well.

2 cups lentils, cooked
2 cups instant organic rolled oats (before grinding), ground into a coarse powder
1 small onion, diced
1 carrot, diced
1/2 tsp salt
olive oil for sauteing

1. Saute the vegetables in the olive oil for about 5 minutes, until softened.
2. Leaving aside about 1/2 cup of the oatmeal powder, mix the remaining oatmeal, lentils, vegetables, and salt together in a large bowl.
3. Form the mixure into balls about 1 1/2 inch in diameter. Roll each ball in the leftover powdered oatmeal before laying it on a cookie sheet.
4. Bake the lentil balls at 350 for 20 minutes.

They can be frozen after cooking -- I would guess they'd keep well for 2-3 months.

Saturday, October 25, 2008

Butternut Squash Cubes

What does it take to make your own baby food? I've been asked this by several people lately. It's really quite simple. And, I think, it's kind of fun, too.

To be fair, I'm not making all her food myself. As mentioned earlier, she's having commercially prepared oatmeal because it's fortified with iron. Also, when she came down with a virus last week, the nurse recommended rice cereal and bananas, so I went ahead and got commercial rice cereal (Earth's Best Organic) as well. I also use jarred organic applesauce and frozen organic peach slices. But so far I have made everything else myself.

Shown in the photo is a tray of butternut squash. I purchased one squash -- organic -- for just under $3. It made a total of 35 cubes. I figure that if you account for the water that's added to the jars, one of my cubes is equal to 1 - 1.5 jars of food. That means my $3 got me the equivalent of more than 23 jars of food, depending on how you count it. Not a bad investment! Even if you aren't concerned about the price of jarred food, though, preparing your own baby food when you can is also environmentally friendly. I saved at least 23 glass jars from being used!

1. Slice a butternut squash in half. Scoop out the seeds and pulp. (Save the seeds for roasting, described below.)
2. Place the two halves face down in a baking dish with about 1/2 inch of water.
3. Cook in a pre-heated, 400 degree oven for about 40 minutes, until soft. (You can check by stabbing it with a fork.)
4. Peel the squash and let it cool for a few minutes.
5. On a large plate, smash the squash with a fork. Make it very smooth.
6. Press blobs of squash into a clean ice cube tray. Freeze overnight. If you have more squash than fits into your tray, the extra can be placed in a tupperware in the refrigerator until there is room to freeze it the next day.
7. Pop the squash cubes out and store them in a plastic freezer bag. Be sure to label and date the squash. It's good for up to two months in the freezer.

Roasting squash seeds:
Rinse the seeds. Toss with a little olive oil and salt. Roast in an oven with something else you're cooking until the oil is all soaked in, stirring occasionally.

Feeding the squash to your baby:
Take a frozen cube from the plastic bag. Heat over low heat in a small saucepan with a few spoonfuls of water. Stir frequently until all the squash is thawed and warm, adding water as necessary.

Wednesday, September 17, 2008

Garbanzo Beans with Spinach and Spices

One of my favorite quick-and-easy recipes -- very low-fat and nutritious!

Ingredients:

1 medium onion, diced
3-4 cloves of garlic, minced or pressed
2 T canola oil
2 T ground cumin
2 tsp ground coriander
1 tsp tumeric
1/2 tsp cayenne pepper (or less if you don't like it spicy)
1 28-oz can diced tomatoes
1 can garbanzo beans, rinsed and drained
1 10-oz package frozen spinach
2 tsp garam masala (Indian spice blend)
1/2 tsp salt, or to taste

1. Saute the onion and garlic in the canola oil over medium heat until translucent.
2. Stir in the cumin, coriander, tumeric, and cayenne and heat for one minute.
3. Add the tomatoes and simmer five minutes.
4. Add the garbanzo beans and simmer five minutes.
5. Add the spinach and simmer until fully thawed. Stir it in.
6. Add the garam masala and salt to taste. Simmer a few more minutes and taste to adjust seasonings.

Serve over brown rice cooked with a little tumeric in the water for yellow coloring.
Optional: If you make it spicy, serve with plain nonfat yogurt on the side.

Saturday, August 2, 2008

Fat-Free Stir-Fry

Finally having recovered from my delivery & postpartum complications, I decided it was time to work on losing the pregnancy weight. I gained a rather astonishing 45 lbs... of which the baby was less than seven. Three months of breastfeeding and limited exercise enabled me to drop 25lbs, and finally at the beginning of July I felt ready to start focusing on diet.

I lost 30 lbs on Weight Watchers in 2004 and I am a big fan of the program. I find it works very well with being vegetarian. Since starting to count points and increase my exercise in the middle of July, I have dropped another five pounds. This recipe for fat-free stir-fry has become one of my lunchtime favorites over the past couple of weeks.

Points Value: 6 (without egg) or 8 (with egg)
All ingredients are Core

Ingredients:

1 cup cooked brown rice or whole wheat pasta
1 1/2 cups frozen vegetables
1/5 block of firm or extra firm tofu, diced
vegetable broth
soy sauce

Optional: chopped onion, minced garlic, chopped hard-boiled egg, cayenne pepper, whatever else you want to throw in

1. Heat a frying pan and spray it with cooking spray. Saute the onion and garlic, if using, until the onion is starting to soften.
2. Saute the tofu until the sides are starting to turn golden. Add vegetable broth as needed to keep the tofu from sticking to the pan.
3. Add the frozen vegetables and saute until cooked through. Add more vegetable broth as needed, and soy sauce for flavor.
4. Add the cooked rice or pasta and saute until heated through. Add more soy sauce as needed.
5. Remove from heat and turn onto a plate. It will be a large pile of food! Mix in the egg, if using.

Hints: When taking care of a baby all day, I don't have time to spend cooking rice or chopping vegetables. I'll make a large pot of rice one day to keep in the refrigerator and use for several days. Same goes for eggs - boil a bunch at once and then eat over several days. The frozen vegetables are a big time-saver, and are often more nutritious than fresh ones anyway. I like the vegetable broth that comes in a rectangular carton that you can keep in the refrigerator, just using as much as you need at a time.

Saturday, July 19, 2008

Crockpot Black Bean Soup

This recipe is adapted from my newest cookbook: Fresh From the Vegetarian Slow Cooker by Robin Robertson. I have made it several times, and loved it every time! It's really quite easy, and the crockpot cooking method is very user-friendly. If you don't have a crockpot, I think you could make it in a regular pot, too.

Ingredients:

1 lb dried black beans, rinsed and soaked overnight
1 T canola oil
1 yellow onion, diced
2 garlic cloves, minced
3-4 carrots, halved and sliced
1 green bell pepper, diced OR 1 14-oz can diced tomatoes with green chilies
1 28-oz can diced tomatoes
2 cups vegetable broth, or more
2 bay leaves
1 T ground cumin
2 tsp dried thyme
1/4 tsp cayenne pepper
salt and pepper to taste

1. Drain or partially drain* the beans and place in a crock pot with water to cover by three inches. Cook on low for 8 hours.
2. Heat the oil in a frying pan and saute the onions, garlic, carrots, and green pepper if using, until softened.
3. Add the vegetables, tomatoes, broth, and spices to the the beans.** Cook for at least another half hour to let the flavors blend.
4. Ladle some of the soup into a blender and puree. Return it to the crockpot and stir it in. It will thicken the soup. You can continue to puree until all of it is smooth, or leave some in chunks.

I like to eat it with sour cream or grated sharp cheddar cheese. You can also make this recipe with canned beans. I would use 3 15-oz cans and reduce the cooking time to six hours, with the vegetables included for the whole cooking time.

Weight Watchers points: 3 per cup of soup.

* Draining the rinse water from the beans reduces flatulence but also eliminates many of the B-vitamins that have soaked out into the water. I usually do a partial drain to try and get the best of both options.
** You can add the sauteed vegetables and the spices before or after cooking the beans. However, the tomatoes, vegetable broth, and salt should not be added until after the beans are completely cooked.

Monday, June 16, 2008

Hummus

I tasted my first hummus in the summer of 1995, and have been a major fan ever since! It's nutritious and oh-so-delicious. Here is my basic recipe:

2 cans garbanzo beans, rinsed and drained
2-6 cloves of garlic (depending on your preferences), peeled and halved
1/2 cup tahini paste (sesame paste)
1/3 cup olive oil
1/4 cup warm water
juice and pulp of one lemon, or 3-4 T lemon juice
1 T ground cumin
salt and fresh ground pepper to taste

1. Put the beans and the garlic in a food processor with the large blade attached. Process until most of the beans are pureed.
2. Add the tahini, olive oil, water, and lemon juice. Process until smooth.
3. Add the cumin, salt, and pepper. Taste for flavor. Add more salt and pepper as needed.

Refrigerated, can last for up to a week. Eat with fresh vegetables, crackers, pita bread, or make into hummus-and-cheese sandwiches.

Optional additions: fresh basil leaves, fresh tomato, fresh parsley

Monday, March 17, 2008

Som Tam

One of my favorite foods while living in Thailand was "som tam" -- spicy raw papaya salad. I wasn't sure whether I'd ever be able to find it in the USA, but it turns out that it's sold at many Thai restaurants! Of course, it costs about 20 times as much as it did in our Peace Corps town.

I haven't wanted to eat much som tam while pregnant, though, because folk wisdom has it that raw papaya can cause contractions -- not something you want early in your pregnancy. Now that I've reached full-term, however, I feel safe eating it again! So on Saturday night we headed over to Uwajimaya - a local Asian grocery store - and picked out the ingredients. Robert made the som tam while I worked on a noodle curry. He did a great job -- it tasted perfect!

1 large unripe papaya, peeled and grated
2-4 cloves of garlic, minced
2-4 small Thai chili peppers, finely chopped
1 cup green beans, cut into 1-inch pieces
1 large or 2 small tomatoes, coarsely chopped
3 T soy sauce, or to taste
1 T sugar, or to taste (optional)
1/2 cup peanuts, coarsely chopped
juice of 1-2 limes

The fresh chilies give it a real kick, so you might want to start on the lower end and increase if you think it isn't spicy enough. Som tam is best eaten fresh, but can keep for about two days, covered, in the refrigerator.

Thursday, February 28, 2008

Phil's Burritos


My stepfather, Phil, makes his own version of these, which are quite delicious. Mine are lower-fat and have less sauce somehow, but I still call them "Phil's Burritos." They are super easy and delicious!

Ingredients:

8 large tortillas (I like whole wheat)
3 cans black beans, rinsed and drained
1 onion, chopped
1 very large or 2 medium jars of salsa
2 cups grated cheddar cheese (or a little more)
sour cream

1. In a large bowl, mix together the beans, onion, most of the salsa, and most of the cheese.
2. Put a couple of spoonfuls of the mixture into each tortilla and fold it into a burrito shape.
3. Bake the burritos in an oven pre-heated to 350 degrees, covered with tin foil, for 30 minutes. I prefer a glass baking dish -- or two, if they don't all fit -- but metal works just fine.
4. Remove the tin foil, sprinkle the burritos with the remaining cheese, and bake 15 minutes more.
5. Serve with salsa and sour cream on the side. Yum!

Friday, January 4, 2008

Pizza Crust


About six years ago, I started making my own pizza crusts. I started with just white flour, then tried just whole wheat, and then experimented with blends of different amounts. I also started kneading by hand, until I learned how to use the food processor. I think I've finally found what is the perfect recipe!

This dough can be frozen before the rising step if desired. Just put it in a tupperware and stick it in the freezer. On the day you will be using it, put it into the refrigerator in the morning, and it will be thawed enough to take out and rise during the evening. You might have to add a little to the rising time.

I usually bake my pizzas on a pizza stone, as it distributes the heat most evenly. But a regular cookie sheet works as well. If using a pizza stone, it should be put in the oven during the pre-heating time. This means you have to work with it when it's hot. But it makes a big difference in the results!

Ingredients:

1 cup water, slightly warm
2 tsp active dry yeast
1 tsp sugar
1 cup whole wheat flour
1 1/3 cups white flour
1/2 tsp salt
1 T olive oil

1. Dissolve the yeast and sugar in the water, stirring well. Set aside for about ten minutes until foamy on top.
2. In a food processor with the basic metal blade, blend together the flours, salt, and olive oil.
3. With the food processor running, slowly pour in the water-yeast mixture. The dough should form into a solid mass.
4. Turn the dough out onto a clean surface. If it seems too wet, add a little more white flour.
5. Shape the dough into a ball and place it in a large mixing bowl that has been sprayed with cooking spray. Cover with a cloth and allow to rise, preferably in a warm place, for about an hour. It is finished when it has doubled in size. (I usually have it sitting near the stove while I am making up sauce and preheating the oven -- this keeps it nice and warm.)
6. When ready, preheat the oven to 425F. If using a pizza stone, put it in the oven during this time.
7. When the oven is ready, sprinkly your pizza stone or baking sheet liberally with cornmeal or flour. Flatten the dough into a large circle on the pan. Add sauce, cheese, and toppings. Bake at 425 for about 15 minutes, until the crust edges are firm and the cheese is just starting to brown.

This is a very healthy dough! When I was on Weight Watchers, I made it with half the amount of olive oil and it was worth 2-points per slice (8 slices total) before the toppings.

*The pizza in the photo was made with my homemade sauce, mozzerella cheese, soy pepperoni, green peppers, onions, and mushrooms.

Friday, December 14, 2007

Spicy Bean Hot Pot

It's not chili... it's not soup... what is it? Spicy Bean Hot Pot!

This recipe comes from a cookbook my mom gave me several years ago called 30 Minute Vegetarian Recipes. All the recipes, while maybe taking a little longer than 30 minutes, are really very easy and don't require complex ingredients. This bean dish is surprisingly good, and has it's own unique taste. It's that type of favorite dish that I often don't remember to make, and then one day I make it, and think, "Why don't I eat this more often?"

I've pretty much stuck to the recipe in the book, but increased the amounts and changed the serving suggestions.

Ingredients:

1 medium or large onion, diced
2 cloves of garlic, minced
2 T canola oil
1 T ground cumin
1 28-oz can of diced tomatoes, undrained
1/4 cup tomato paste
several tablespoons of Tabasco or other hot pepper sauce, to taste
1 can kidney beans, drained and rinsed
1 can pinto beans, drained and rinsed
1 can white (cannelini) beans, drained and rinsed
salt and pepper to taste
grated cheddar cheese for serving

1. Heat the oil in a large pot. Saute the onion and garlic until onion is translucent. Stir in the cumin and saute another 1-2 minutes.
2. Add the tomatoes, tomato paste, and hot pepper sauce. Stir well and bring to a simmer, about 5 minutes.
3. Stir in the beans. Add a little bit of water if necessary, but not much. Cook until heated through, stirring occasionally, about 15 minutes.
4. Season with salt, pepper, and additional hot pepper sauce to taste.
5. Serve with grated cheddar cheese. I like to have baked potatoes or fresh bread on the side.

Here is the cookbook -- I don't know why it's sideways.

Monday, December 3, 2007

Shepherds' Pie

On a cold, rainy night, of the sort we've had here in the Pacific Northwest recently, it's very nice to have a simple meal cooked in the oven. I first made a vegetarian shepherds' pie just over three years ago, but we liked it so much that I made it several times more before we left for Thailand. Though my original recipe -- a modification from The Joy of Cooking -- is currently buried in storage, I put together an attempt this evening. It turned out quite nicely.

Ingredients:

4 medium potatoes
1 T canola oil
1 medium onion, diced
2 large carrots, diced
3 celery stalks, diced, with leaves
3/4 cup fresh or frozen thawed green peas
equivalent of 1 lb. meat, in meat substitute form (I prefer White Wave traditional flavor seitan, but have also used Gimme Lean beef style), chopped or crumbled
1/2 to 1 cup vegetable broth
1 T fresh or dried rosemary
1 tsp dried thyme
butter or margarine

1. Boil or bake the potatoes until soft. Remove skins and mash, with a little milk and butter if you like, or just plain is fine too.
2. Heat the oil in a large skillet. Saute the onions and carrots until the onions are softened.
3. Stir in the meat substitute. If necessary, brown it. (I usually brown Gimme Lean products, but not seitan.)
4. Stir in the celery, rosemary, thyme, and vegetable broth. Continue cooking until broth is absorbed.
5. Stir in the peas. Add salt and pepper to taste. Remove from heat.
6. Spread the mixture in a 9x9 pan. Cover with the mashed potatoes. Dot with butter or margarine.
7. Cook at 350 for 30 minutes, uncovered.

Wednesday, November 14, 2007

My Favorite Salad Dressing

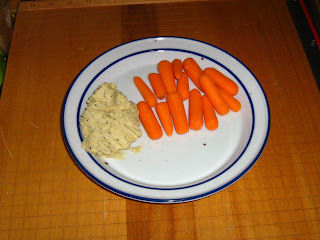
I got a version of this salad dressing from a Weight Watchers message board several years ago, and instantly was a fan. Since then I have completely forgotten the correct proportions and usually just throw it together as fast as I can. It's supposed to be a vegetarian caesar salad dressing, but I don't know if it tastes much like caesar or not. I like to use it as a dip with carrots as well (pictured).

Nutritional yeast is one of those ingredients that I avoided for years because it seemed too "odd." But I first used it in this dressing, and I became an immediate fan. It's a yellow powder that's very high in B vitamins -- especially B12, which is difficult to get if you don't eat animal products. I usually buy it in the bulk section at Whole Foods.


1/2 cup olive oil, or more if needed
1/4 cup nutritional yeast
1 clove garlic, smashed
1 T Dijon mustard (regular yellow mustard works, too)
1/4 cup tahini paste (sesame)
juice of 1 lemon, and a bit of pulp if you like
Kosher salt and fresh ground black pepper to taste

1. Mix all ingredients together until well-blended.
2. Serve with salad or fresh-cut vegetables.
-- Can be stored in the refrigerator, covered, for up to one week.

Wednesday, November 7, 2007

Moroccan Couscous

Tonight I made this recipe -- one of my favorite dinners. It's very easy and full of flavor. It's also got tons of nutrition, including the healing powers of turmeric!

The recipe is adapted from The New Vegetarian Epicure by Anna Thomas. I've omitted a couple of ingredients, adjusted the spice levels, and added garbanzo beans for protein. I like to serve it with plain yogurt on top. Don't be put off by the long list of spices. I usually just line them up in order on the counter right before I start cooking, and move down the line with my measuring spoons.

Sauce ingredients:

2 T canola oil
1 medium onion, diced
6-7 cloves of garlic, crushed
3 tsp ground cumin
1 1/2 tsp turmeric
1/2 tsp cinnamon
1 tsp ground coriander
1/2 tsp cayenne pepper
1/2 tsp paprika
2 cups vegetable broth
1 - 28 oz can diced tomatoes
2 - 15 oz cans garbanzo beans, rinsed and drained

1. Saute the onion and garlic in the oil over medium heat until the onion is translucent.
2. Stir in the spices and continue sauteing for 2-3 more minutes.
3. Add the tomatoes and the broth, bring to a gentle boil.
4. Add the garbanzo beans, return to a simmer, and cook 10-15 more minutes until heated through.
5. Serve over couscous (recipe below) with yogurt on the side.

Couscous ingredients:

2 cups vegetable broth
1 3/4 cups water
1 T butter or margarine
2 cups regular or whole wheat couscous

1. Combine the first three ingredients in a saucepan; bring to a boil.
2. Lower the heat to its minimum level and stir in the couscous.
3. Cover for five minutes. Remove from heat.
4. Let sit for two minutes before fluffing and serving.